Pound cake by Alton Brown

Somedays you need the comfort of a good old fashioned pound cake. This one from Alton’s lovely “I’m just here for more food” which is my most used cookbook works every single time! It is the buttermilk that gives this cake its super tender but still firm crumb. This cake is also sensational toasted a few days later (if it lasts that long)

I use a 10 cup bundt pan for this- but you can use any pan you wish- I’ve never tried cupcakes with this recipe but they should work fine as well- just go down on baking time. This is a good 1st cake recipe for kids or anyone new to baking.

Step 1 is essential  (several hours before baking): Bring 2 sticks of butter, 3 eggs and 1 cup of buttermilk to room temperature

Step 2: Heat oven to 325F and Cream 2 cups of sugar and 2 sticks of butter. This is the most vital step and my stand mixer makes this a breeze. Alton in his book explains that creaming means a) the mixture looks homogenous and fluffy b) you can still feel the individual grains of sugar between your fingers. Always scrape the bowl once

Step 3: Add the eggs one by one and add 1tsp of good vanilla extract. Beat on high for 3-4 minutes untill the mixture is well incorporated and fluffy. Remember to scrape the bowl.

Step 4: Add 3 cups of flour (14.5oz) and 1 cup of buttermilk to the mixture gradually. I add each in thirds- alternating the flour and the buttermilk. Scrape the blade and the bowl at least once to make sure you don’t have unmixed batter

Step 4: Pour into prepped bundt pan (I use Pam baking spray) and bake for an hour. Cool fo 15 minutes

This is delicious plain or with any toppings.  I served this last week with rasperry coulis (1 bag of frozen rasperries, 3 tbsp of sugar, the zest of one orange and 1/4 cup of fresh orage juice) and orange whipped cream (whip 1 cup of heavy whipping cream with 1/4 cup of sugar and zest of one orange)

Paneer Ghee Roast (Kerala Style)

I love South indian preparations- in both dry and curry form. But the techniques are so tedious- scrape cocount, grind to paste, dry paste- so on and on and on. This is my version of a much quicker dry roast. The masala will not be as smooth as a blender-ground masala but the flavor is spot on and this dish will be ready in 30 minutes.

Prep:

Chop: 1/2 a large onion diced (about 1 cup), 4-6 cloves of garlic, 3-5 kadipatta leaves (chopped fine)

Masala: mix together 2 tsp of  ground red pepper  (I used the Korean Gochugaru but Kashmiri red chillies  will work), 1 tsp ground cumin, 1 tbsp ground coriander, 1/2 tsp of turmeric, 1 tsp ground fennel seeds and 1/8 tsp ground methi(fenugreek) seeds. ( I used a mortar and pestle to grind the fennel and methi  to add to the powders)

Other flavorings: 2 tbsp tamarind paste (which I always have frozen) and 1 tbsp ground jaggery

Cook:

Cube 1/2 lb of paneer and roast in 1 tbsp of ghee on a low flame till lightly browned. Remove to a plate.

In the same pan, add another 1 tbsp of ghee, add curry leaves and onion. Cook till onion starts turning translucent.

Add masalas and roast till fragrant (around 1-2 minutes) without burning any of the ingredients.

Add tamarind, jaggery, 2 tbsp of yogurt and 1/4 cup of water. Cook for a minute and add paneer.

Cover and cook on low heat for 10-15 mintues.

Serve with dosa or rice or appam.

Tamago Sando (Japanese Egg Sandwich) and Japanese Milk Bread

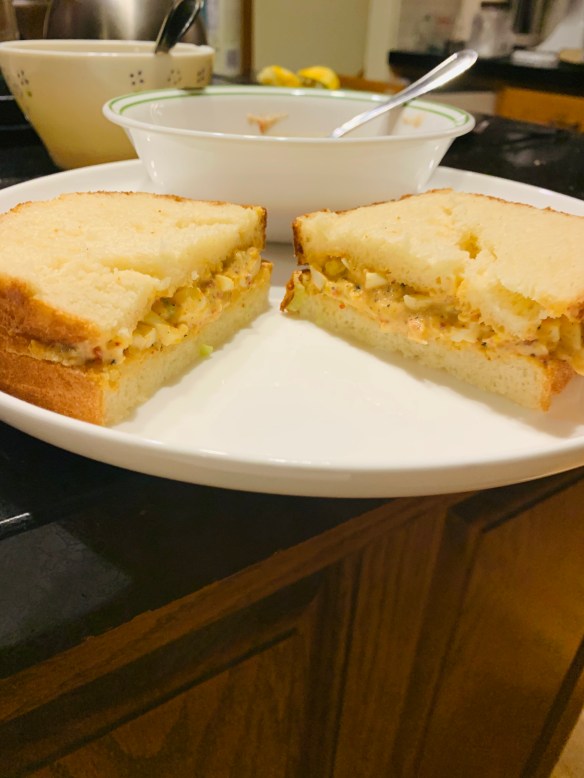
Every expat or immigrant knows that there are dishes you crave when you go back home. Apparently in Japan, it is these egg salad sandwiches- with the softest bread and the simplest of dressings (kewpie mayo, salt and pepper), it is a taste of home for the Japanese. I wouldn’t know- I’ve never been to Japan but I do like egg salad and this was a snowy weekend project.

This recipe is in 2 parts- part one is the egg salad and part 2 is the bread. I have no idea if any of this tasted like the real thing but it was pretty tasty to us.

Egg Salad:

Mayo: All the recipes specifically call for Kewpie Mayo which I could have ordered off amazon or boutht at the Asian store. But instead- I improvised and landed up with something quite delicious (though likely not at all accurate). To 5 tbsp of regular mayonnaise, add 1 tsp of rice wine vinegar, 1 tbsp of sugar, 1 tsp of red pepper flakes, 1 heaped tsp of Dijon mustard, 1 tsp of nutritional yeast (in place of the dashi powder or MSG in most recipes), ½ tsp of granulated garlic and salt and pepper. Increase or decrease the quantities of the additives to your liking till the mayo becomes a delicious dip that  you repeatedly “taste” and then find a cracker to “taste” some more.

Boiled eggs: I love reading about boiling eggs. The serious eats encyclopedia entry on this is one of my favorite food articles. For hard boiled eggs- this works for me- start eggs in cold water and set timer for 15 minutes– the yolks are firm and a beautiful yellow wihtout being rubbery.

Combine chopped eggs with special mayo and 2-3 finely chopped scallions (because Japanese dish).

This is a delicious egg salad- good with any kind of bread but let’s now make the special super soft Japanese bread. Our old friend America’s test kitchen’s bread illustrated book will help us.

Fair warning- this is not a beginner bread, you need to have a fair idea of dough hydration and proofing times. But it isn’t croissants (laminated doughs hate me) –  you should try it. Bread flour is cheap- you can throw away your mistakes.

Start by bringing 3 tbsp of butter to room temperature (soft but not melted). The bread starts with a cooked flour and water paste (a Japanese roux) which leads to a very tender crumb. Whisk 3 tbsp of flour and 1/2 cup water will no lumps remain. Microwave covered, whisking every 20 seconds till the  mixture forms a stiff pudding.

Add the flour paste, 1/2 cup of cold milk and 1 large egg to your stand mixer and use the whisk attachment to blend till smooth (note to self- use blender next time).

Add 1.5 tsp of instant yeast and 11 oz (2 cups) of bread flour. Switch to the dough attachment and knead on low speed for 2-3 minutes till a sticky dough forms. Cover with cling film and rest for 15 minutes.

Add 2 tbsp of sugar and 1.5 tsp kosher salt to dough. Knead for 5 minutes, then add butter 1 tbsp at a time. Knead on medium speed for another 5 minutes till the dough leaves the sides of the bowl but still sticks to the bottom.

Transfer to a floured surface using a bench scraper and form a smooth round ball lightly coated with flour and tuck all the seams under the dough ball. Proof in a lightly greased container for 1-2 hours till doubled in size.

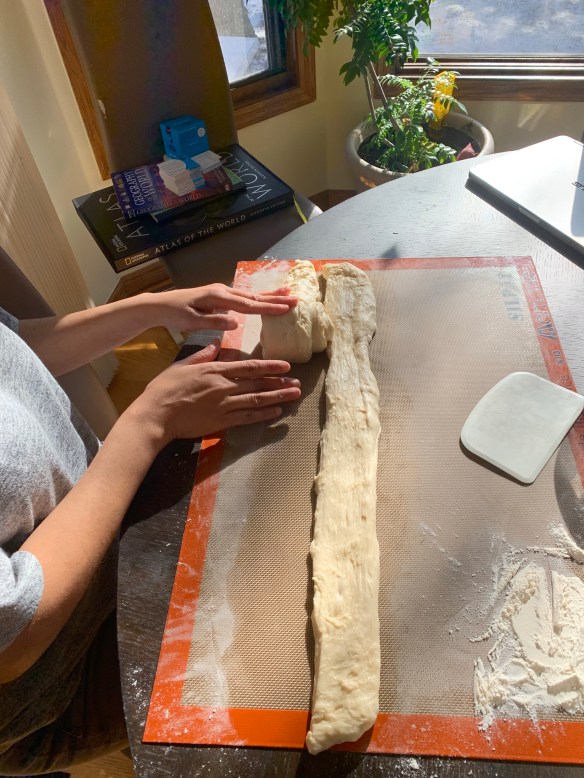
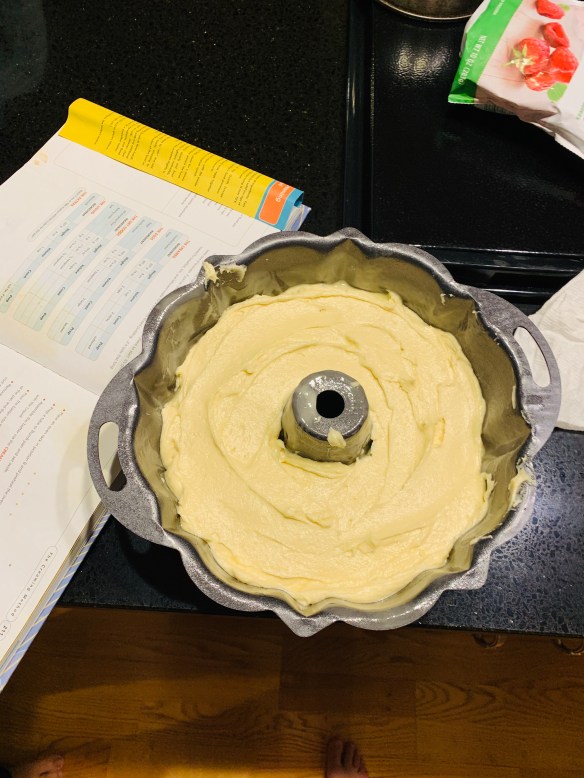
Shaping dough: take dough out onto a large floured area on your countertop ( I use a very large silpat on my countertop for this). Shape into a 24×4 inch rectangle. Now divide the dough using your benchscraper lenghtwise to get 2 rectanges 24×2 inches in size. Start rolling the 2 dough strips into tight spirals and place both side by side into a greased 8.5×4.5 inch loaf pan. Cover with cling film and proof for 1/2-1 hour till the bread rises to the lip of the pan.

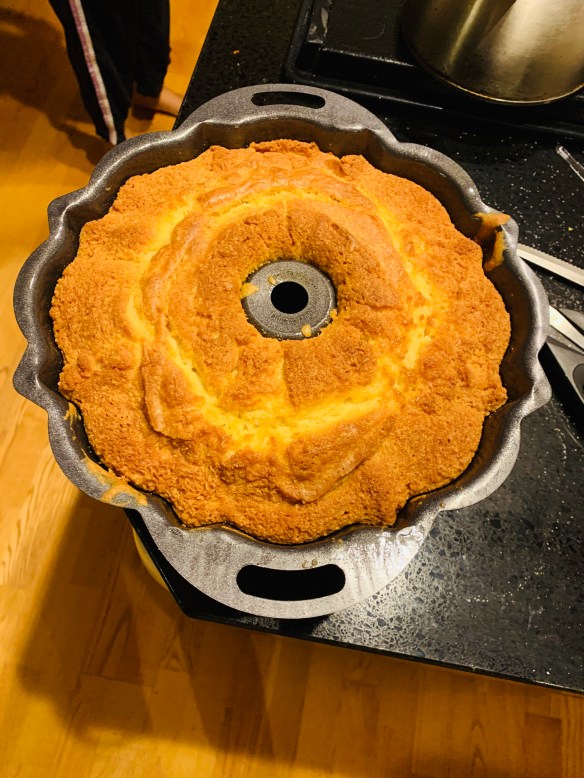
Bake at 375 degrees for 30-35 minutes till the bread is a deep golden brown. Cook for 15 minutes, remove from pan and brush all over with  butter. Let bread cool for 2-3 hours before serving.

Slice and pile with egg salad above. Delicious with tomato soup.

Portugese Egg Custard Tarts

When my favorite youtuber Babish released an egg tart video, I knew I had to make these. But unusually for me, I decided to go with the simpler approach of using store bought puff pastry rather than making my own puff (something I have tried and failed at in the past). These seemed to be delightful morsels of buttery crust with a jelly like custard interior and everyone online kept using superlatives to describe them. So instead of going to Portugal or actually finding a Portuguese bakery, we took these on as a snowy day weekend project inspired by this Melissa Clark NYT recipe. I also watched and re-watched cupcake Jemma make these, because she is lovely and soothing.  The trick seems to be keeping the pastry cold and using an extremely hot oven to develop a shatteringly crisp crust. These would be good with any filling – I plan to try lemon curd next.

Makes 24 small tarts- start 2 days before you actually wish to consume the pasteis de nata

Step 1: Buy some all butter puff pastry (I used Trader joes) and buy a mini muffin pan ( I used Sur La Table where I also spent an unnecessary amount of money buying cooking tchotchkes)

Step 2: Roll out half your puff pastry (about 7-8 oz) into a 13×13 inch square or an 18×9 inch rectangle. Start rolling into a log from the larger side- so you should have an 18 inch log about an inch in diameter. Wrap in parchment and chill for several hours (or overnight)

Step 3- divide pastry log into half and then quarters and then thirds to get 24 pieces, Press the flat discs down and then along the side of the mini muffin pan. Cover with cling film and chill

Step 4- make the custard

Step 4a: read the instructions multiple times so you don’t goof up and have to throw away your first 2 attempts- hey, eggs are cheap, it’s ok. In retrospect- I should have made this in the blender- notes for next time.

Step 4b: There are 3 parts to this custard- assemble the 3 parts first. A cinnamon syrup ( 1/2 cup of sugar, 1/2 a cinnamon stick and 1/3 cup water- heat till sugar dissolves- take off heat, discard cinnamon), 3 egg yolks and a flour paste (start with 1/4 cup of all purpose flour and 3 tbsp of milk- whisk in 1/2 cup of scalding whole milk-  heated till bubbles just form- this is tougher than it looks and requires quite a lot of upper body strength)

Step 4c: Add sugar syrup to the flour mixture and return to the heat- Whisk continuously for 5 minutes till mixture is thickened and paste like without any lumps

Step 4d: add some of the flour mixture to the egg yolks whisking continuously- then add more gradually till both are combined. If you do this correctly- you will NOT have scrambled eggs but a smooth custard. If any custard calls for straining- it is this one- strain it.

Step 5- You remembered to heat your oven to 500F right? and the cookie sheet is on the bottom 1/3rd- good!. Add custard to the tart shells and bake for 15-20 minutes till custard is puffed up and lovely with some char and the pastry is crisp

So this recipe is tough! I have made many custards from scratch and this one was difficult! Was it worth it? Yes! Did we finish 24 tarts in one sitting? Of course we did!

Shakshuka dosa

I combined my 2 favorite brunch items today and they were delicious together

Deconstructed shakshuka : this is how I like to make shakshuka – with a fried egg rather than poached (it’s easier and less messy and I like the crispy fried edges of the egg)

Sauce: 1 tbsp olive oil – add 1 tbsp cumin seeds and heat till they sputter and turn color. Add 1 diced onion and 1 diced red pepper. Cook over medium to high heat till onions brown. Add 1 14 oz can of tomatoes with 1 tbsp minced garlic, 1 tsp cumin powder, 1 tsp coriander powder, 1tbsp gochuang paste (not essential but delicious), 1 tsp soya sauce and cook for 10 min. Add salt and chilli powder to taste (about 1 tsp of each). Finish with 1 tbsp butter and 1 tbsp balsamic vinegar

Top onion, tomato, pepper mixture with fried egg when ready to serve.

Serve with dosa in place of bread

Chickpea stew

This is a really good Persian stew. Well possibly, I don’t know any Persian people but the flavor seems to be Persian , it’s got nearly a cup of parsley and dried lemon. In any case it is very very good. I got the dried lemon on amazon after ottolenghi praised it (of course)

Caramelize 1 onion with 1 tbsp cumin seeds and 2 dried red chilies and salt in 4 tbsp butter (yes the quantities are right- this will take 30 min on mild- mod heat)

Add 1-2 tbsp chopped garlic, chickpeas (1 cup dried- soaked overnight and pressure cooked for 15 min), 1 can of tomatoes puréed and 4 cups of veg broth (I used better than bouillon) and 1 tsp cumin and 1 tsp coriander powder and 1 dried lemon.

Simmer for 45 min

Add 1.5 cups pasta – cook for 12-15 min

Add about a cup of chopped parsley – fish out the lemon

Very delicious

Sheet Pan Fried Rice

Without the necessary BTUs- I have found it impossible to achieve the fried rice of my dreams. Wok-kissed, each grain glistening with fat and flavor- the kind of fried rice served in Chinatowns everywhere.

Until I found this recipe! Fried rice in the oven- with high heat from all side- it is a brilliant idea and works like a charm.

Rice: I cooked 1.5 cups of white rice in the rice cooker and then cooled the rice on a baking sheet

Vegetables: I used a blend of frozen peas, corn and beans – defrosted in the microwave

Protein: I used trader joes meatless meatballs- heated in a pan with some oil for 5-10 minutes

Sauce: 1 tbsp gochuang (from whole foods), 2 tbsp soy sauce, 1 tbsp oil

Technique- mix all- set in oven at 450 F for 10-15 minutes till rice grains get slightly charred on top- add salt if needed

Top with sliced scallions and some chilles in vinegar ( chillies sliced, vingegar, salt, sugar)

This one is a weeknight keeper- total prep time is less than 10 minutes (slice scallion while defrosting stuff). The NYT recipe has fresh veggies in it- which I’m sure will also be delicious.


IMG_2279.jpg

Mochi balls with puran

My favorite sweet in the world is puran poli- the maharashtrian roti stuffed with sweetened chana dal. When I saw a Tasty video on sesame mochi balls with red bean paste inside- I knew I wanted to replicate the recipe with puran inside the mochi. Kadbu (a dish from Karnataka is after-all just puran inside steamed rice dough). Also I have an appe pan which is exactly the same as a takoyaki pan. It seems as though the stars were aligned.

Mochi is made from glutinous rice, an entirely different species of rice flour from what is commonly used in India. This has to be ordered off Amazon or bought from an Asian grocery store. I ordered the Mochiko flour brand.

Puran: Pressure cook 1 cup of washed chana dal for 15 minutes. Drain. Mash with 1/4 cup jaggery and 2-3 tbsp sugar. Add 1 tsp of cardamon powder and any dry fruits you wish ( I added chopped up dried apricots). Make balls of puran.

Mochi: Make a soft dough from 1 cup of glutinous rice flour with 1/2 a cup of warm water and 1/2 tsp of salt. Flatten a ball of mochi and fold around a smaller ball of puran. Roll the whole thing in sesame seeds. Repeat.

Cook the mochi gently in a takayoki pan or an appe patra or an abelskeiver pan (all freely availalbe on Amazon) for 5-7 minutes with a little oil. Rotate till all the sesame seeds are golden brown.

The mochi is super gelatinous when hot but becomes deliciously less sticky as it cools. This is a truly fabulous treat.


IMG_0419.jpgIMG_0417.jpgIMG_0416.jpgIMG_0418.jpg


Creme Caramel

Sometimes- you need a good vanilla pudding to end the day. This recipe for creme caramel hits the spot every single time

Make caramel: My favorite way is to use a non-stick pan and a small silicone spatula. Heat 1/2 cup of sugar till it starts to melt- then stir gently till the sugar reaches a beautiful amber brown. Pour into your serving ramekins or baking dish and swirl it around the sides. Careful- that stuff is hot

Make custard: Beat 1 cup of whole milk, 1/2 cup of cream, 2 eggs and 1 egg yolk with 1/3 cup of sugar and 1 tsp of good vanilla (chanelling my inner Ina Garten) till smooth. Pour into prepared pan/ramekins

Bake custard: Bake in a waterbath at 375 for 35-45 minutes. I personally do let the top brown just a little bit. There is nothing worse than unmolding a flan to have the center still liquid.

Cool custard for 2-3 hours, unmold (run a knife along the edges)

IMG_0426.jpg